You have worked your sock – either toe-up or top-down – until you have reached the point where your ankle just starts to bend at the top of your foot. You have figured out how many stitches you will need to go around your heel comfortably. Now let’s knit a heel turn!
(Customization note: If you have a lot of stitches to increase, you may want to start the heel increases up to an inch BEFORE you get to this point to make a more gradual transition. Jump ahead to see where to mark for the increases, and start working them in pairs gradually, say every third round or every 4th round. When you reach the heel turn point, start working them every other row as described below.)
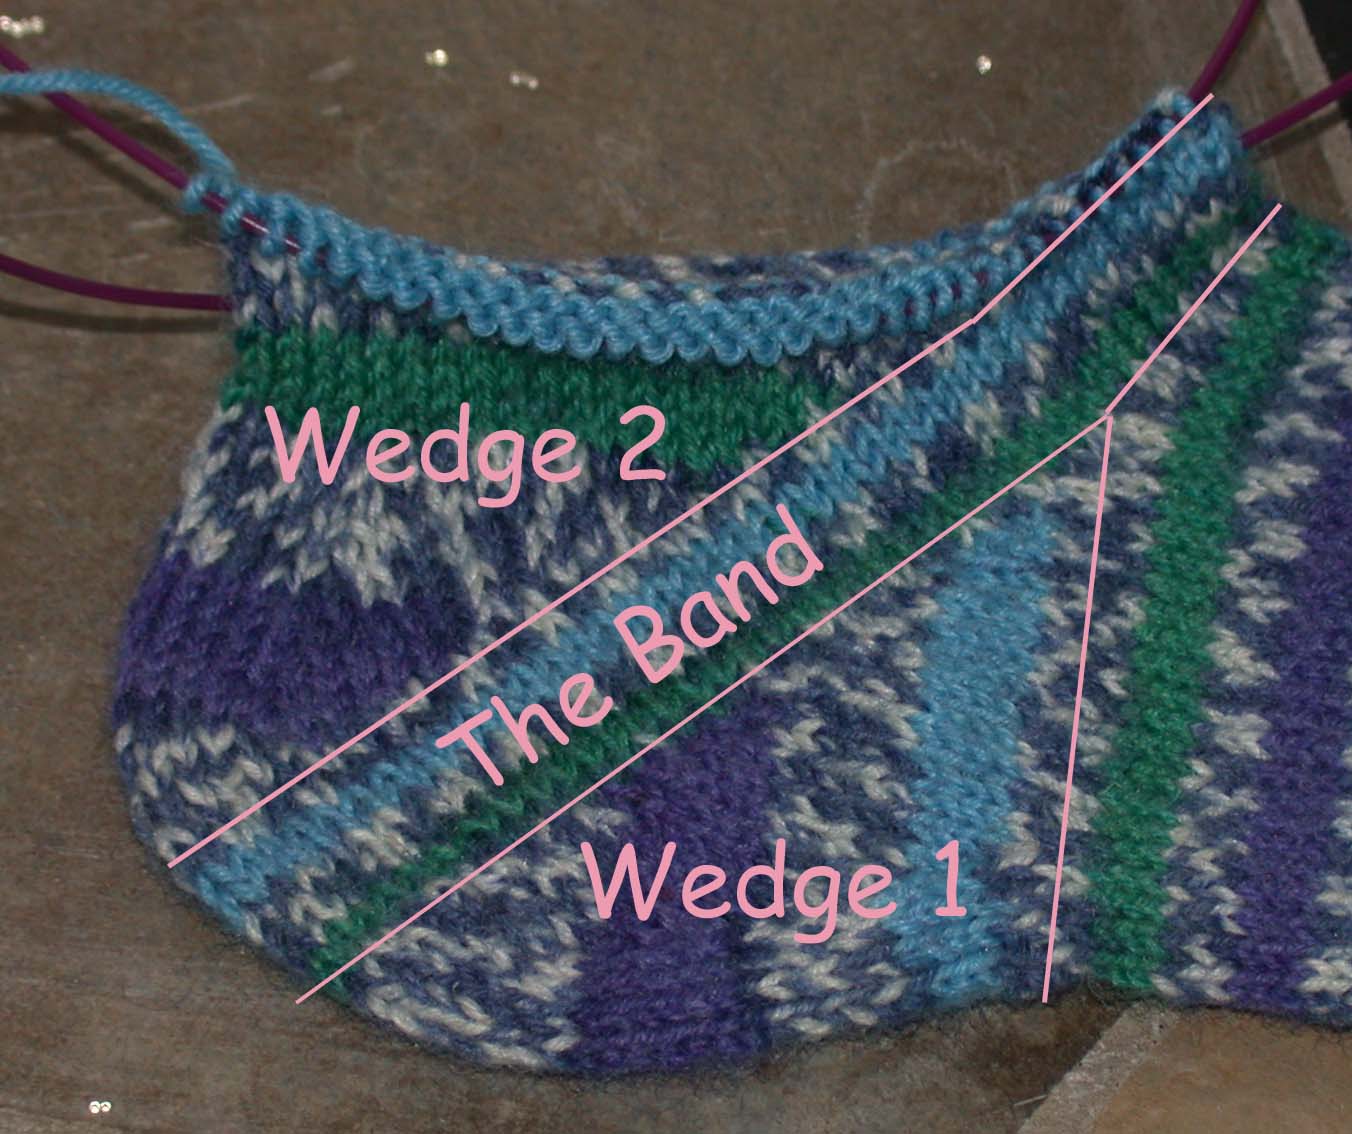
The Banded Expanded Short Row Heel consists of three distinct sections: Wedge 1, The Band, and Wedge 2. Work the sections in this order regardless of whether you are working toe-up or top-down.

- The instructions are given for a stockinette heel. If you are working in another pattern stitch, substitute your own pattern stitches wherever these instructions say to knit or purl.
- I follow Cat Bordhi’s method of handling short rows in Cat’s Sweet Tomato Heel Socks by turning, slipping the first stitch, and subsequently working a “Thanks, Ma!” stitch on the way back. Any short row method will work as well, including wrap-and-turn followed by working the wrap together with the stitch.
- Use markers as you see fit throughout.
WEDGE 1
You will now begin working in rows.
Beginning at the center back of the heel, knit one third of your total stitches. (If you began your increases early, this will be one third of your original number of stitches, plus any increases you have worked.) Turn.
Slip the first stitch purlwise with yarn in front. Purl back on those stitches, then continue to purl the next one third of your total stitches, still with wrong side facing. One third of your total stitches will remain unworked at the front of the sock.
Turn. Slip the first stitch purlwise with yarn in back. Counting this stitch, knit until you have worked an even number of stitches and are a generous half inch from the center back. Increase one stitch. Place marker. Continue working, placing another marker the same distance from the center back. Increase one stitch and knit until you are two stitches from the place you turned previously. Turn, slip the first stitch as before, and purl back, stopping two stitches before you turned previously.
Continue in this way, increasing before and after the marked off center heel section on each right side row, until the total number of stitches (including the ones held for the front) equals the number of stitches you need for your heel band.
Now continue to work short rows without increasing, stopping and turning two stitches shorter each time and slipping all first stitches, until you find yourself turning to the right side at the same point as your increase marker. Knit to the center back of heel. You are ready to work The Band.